Showing posts with label cupcakes. Show all posts

Thursday, September 18, 2014

Pomegranate Cupcakes

Baking different kinds of cupcake flavor can be fun! When my mum bought a few pomegranate from a farmer's market, I decided to take a few of those pomegranate, and turn them into cupcakes. I love the taste of pomegranate as juice. I've seen a few pictures of pomegranate cupcakes, and they are super cute with the little seeds topping! I thought it would be great to experiment with pomegranate cupcakes.


All I did was to add a bit of pomegranate juice and seed in my vanilla cupcake recipe, frost them with cream cheese frosting, and sprinkle a bit of pomegranate seed on top. The cakes are a bit yellowish, and a bit pinkish. You can add a bit pink coloring to your batter if you want it more pink.
Pomegranate Cupcakes

125g butter (softened)
2 eggs
3/4tsp vanilla essence
180gm self raising flour
1/2cup pomegranate juice
170gm castor sugar
1/4tsp salt
1/4cup pomegranate seed
Cream cheese frosting
More pomegranate seed (to decorate)
  1. Preheat oven to 180 degrees Celsius.
  2. Combine all ingredients in a mixing bowl and beat until smooth with an electric mixer.
  3. Place mixture into lined cupcake trays using a spoon, filling each until 3/4 full.
  4. Bake for 15 minutes.
  5. Cool completely before decorate.

Sunday, June 29, 2014

Vanilla Cupcake with Rose Buttercream & updates!

I'm such a bad blogger. I abandoned this my food blog for a while without updating, even though I did promise I was going to update. It's not that I haven't been cooking or baking. I guess, I've been lazy to write up a post. There are, however, a lot pictures of food on my desktop/SD card waiting to be uploaded. It's just like I've said, I'm being lazy.

To make up for my laziness, I've baked these cupcakes to apologize. (Ok, that's a lie. I baked these for mother's day months ago, but was too lazy to write up a post).


I've seen people making these cupcake bouquets before and wanted to try them. Instead of buying my mom a bouquet of roses, I've decided to bake some cupcakes, and presented them in a bouquet. And instead of having real roses, why not replace them with vanilla cupcake with rose buttercream? They taste (a bit) like roses, and smell like roses.


These cupcakes bouquet was really easy to make and assemble. They're super cute and fun! Perfect as a gift, don't you think?

Thursday, July 18, 2013

Creating the Perfect Icing for Your Cupcakes

Let's welcome Anita Kushwaha with her new book titled "For the Love of Cupcakes"! Anita's new book will be launched in July 2013. She's very excited to share her tips on creating the perfect icing for your cupcakes!

Creating the Perfect Icing for Your Cupcakes

Is the icing your favorite part of a cupcake? Does a mere glimpse of the perfect light and fluffy swirl through a dessert case window make your eyes dilate, your mouth water, your taste buds scream: We want i-cing! We want i-cing!

Just as the old adage suggests, when done properly ‘the icing on the cake’ can be the sweet finishing touch that enhances the flavour of a cupcake. On the flipside, when incorrectly executed it also has the power to ruin. We’ve all been subjected to inedible icing that’s either too hard, too runny, too sugary, to lumpy, too bland—too neon pink. Gulp. And we all know where it ends up—scraped off into little mounds of disappointment on the side of the plate. Tragic.

Icing-lovers, take heart! In this post, I’ve provided some tips that will help to get your icing preparation technique to the next level of yum.  
  1. Measure up! Baking is as much a science as it is an art and craft. Following a recipe exactly will help to ensure your success. It seems like a no-brainer, but when we’re under time constraints, shortcuts can be all too tempting. I’d encourage you to channel your inner chemist and follow that recipe like it’s the procedure to an experiment.
  2. Temperature. Working with solid fats (e.g. butter, cream cheese) at room temperature will make it easier to incorporate air and sugar into your icing, making it light and fluffy.
  3. Consistency is key. Icing is best when it is smooth and creamy. As mentioned above, working with fats that are at the correct temperature will help the overall consistency. Also, if you find that your icing is on the runny side, this can be corrected by adding a bit more icing sugar. Many recipes provide a range when it comes to the amount of icing sugar (e.g. 3-4 cups, 6-8 cups, etc). Conversely, if your icing is on the lumpy and dry side, adding moisture (e.g. milk, other liquid flavorings) one tablespoon at a time can help to loosen things up a bit.
  4. Whip it good. Whip it real good. One of the key attributes of fabulous icing is its light and fluffy texture. So, take the time to beat in lots of air. The bonus is that this will also help with the overall consistency of your icing.
  5. Scrape. Then scrape some more. By scraping down the sides of your bowl, right to the bottom, you will ensure that all of the ingredients in your recipe actually get incorporated into the icing.
  6. Melt in your mouth, not on your cupcake. Make sure your cupcakes are completely cool before you apply the icing. Otherwise, all of your hard work will simply melt and slip off. In a crunch for time? Pop the cupcakes in the fridge to speed up the cooling process.
  7. Fridge to set. After decorating your cupcakes, place them into the refrigerator for about 15 minutes. This will help the butter in the icing firm up and set. 


Wishing you sweet satisfaction,
Anita Kushwaha


Author's Bio:

Anita was born on Spring Equinox, on the cusp of Aries and Pisces. According to the Chinese Zodiac she’s also a monkey.

She loves the creative process in its various manifestations and enjoys spending time writing and teaching yoga.. Baking gets her out of my head, a remedy for writer’s block. Anita is also a loving wife, devoted auntie and proud cat mom. Her cat’s name is Noodles. He looks a bit like Garfield.

Other things Anita loves besides writing and baking are trees, whales and elephants. Her favorite color is green. She have no desire to travel to space, but a trip around the world ranks high on her bucket list. Writing is Anita’s chosen method of self-expression and has been from a young age. Last but not least, she bleeds red and white, as any proud Canuck.

Her debut novel, For the Love of Cupcakes, was released on July 15, 2013 by Take Two Publishing.

To find out more about Anita and For the Love of Cupcakes visit:

Anita’s Website | Anita’s Facebook | Anita's Twitter

Tuesday, June 19, 2012

Passion Fruit Cupcake


I first heard of passion fruit during my practicum training four years ago. I had to prepare a passion fruit mousse. I remember that they were using passion fruit puree. So I have absolutely no idea how a passion fruit looks like.... Imagine how excited I am when I saw this fruit in the market! I bought them without really knowing how to tell if they're ripen or not, and not knowing how to eat this fruit. So I decided to cut them into half, and eat the inside. Passion fruit had a tart and acidic taste with aromatic flavors. I decided that I'm going to experiment making passion fruit cupcakes. I thought it's going to taste perfect -- and summer-ish.


Passion Fruit Vanilla Cake (modified from Angry Cherry's recipe)

1 & 3/4 cups all-purpose flour
1 teaspoon baking powder
1/2 teaspoon salt
3/4 cup unsalted butter, softened
1 cup sugar
3 large eggs, room temperature
2 teaspoons vanilla extract
1/4 cup passion fruit puree
1/4 cup milk (I used coconut milk)

1. Preheat the oven to 350°F/175°C
2. Sift together the flour, baking powder, and salt. Set aside.
3. Cream the butter and sugar together until light and fluffy. Beat in the eggs, one at a time, making sure the batter is completely smooth and the each egg is incorporated before adding the next.
4. Stir in the vanilla extract passion fruit puree and milk.
5. Add the flour slowly and fold the ingredients together.
6. Divide the batter equally between the muffin cups.
7. Bake for 30 ~ 32 minutes, or until a cake tested inserted into the middle-most cupcake comes out clean.
8. Allow to cool to completely before frosting.

I frosted the cupcake with creme cheese frosting and spooned a bit more of extra puree on top. The cake itself taste really good (especially when they are still warm out of the oven)!

What would you experiment to do with this fruit?

Visit Angry Cherry to learn to make a passion fruit frosting!


Tuesday, May 15, 2012

Easy Vanilla Cupcake & Award


It seems that I have been posting on lots of cakes, dessert and sweet things recently. I couldn’t help it. It seems that I got lots of desserts and sweets stuffs project going on – Cupcakes, pastillage, chocolates and more cupcakes... I think there will be more desserts projects coming on for the next couple weeks… 


Anyway, these cupcakes were part of my project for this month. I was supposed to prepare these vanilla cupcakes with two different themes – Turquoise and Yellow. I made some royal icing flowers for the toppers a few days earlier and kept them in an air tight container. This is the first time made a royal icing flowers. So, the shape was a bit inconsistent.


The cupcake was then frosted with Swiss meringue butter cream and topped them with those royal icing flowers. How do they look?  Which one is your favorite? Here's the recipe for the vanilla cupcake. It was actually a basic recipe which you could find almost anywhere online. But I got them from the cupcake class that I went to last time.

Easy Vanilla Cupcake

125g butter (softened)
2 eggs
3/4tsp vanilla essence
180gm self raising flour
1/2cup milk
170gm castor sugar
1/4tsp salt
  1. Preheat oven to 180 degrees Celsius.
  2. Combine all ingredients in a mixing bowl and beat until smooth with an electric mixer.
  3. Place mixture into lined cupcake trays using a spoon, filling each until 3/4 full.
  4. Bake for 15 minutes.
  5. Cool completely before decorate.


Anyway... Ambreen from Simply Sweet 'n Savory had been so kind to share the versatile blogger award with me. Don't forget to visit Ambreen's blog. There are lots of interesting recipes and good looking pictures! Thank you, Ambreen :)

Sunday, November 6, 2011

Engagement Cupcakes


Engagement cupcakes! Red velvet cupcakes with cream cheese frosting topped with white fondant. They look pretty simple and pink. I was aiming for red, but turned up with pink fondant instead. Oh well...


This is how the engagement cupcake box looked like. And sent to the girl's family as a hantaran, or gift. What do you think?

Monday, September 12, 2011

Experimenting: Vocaloid Birthday Cupcakes


My little sister is a fan of Vocaloid. So, I thought of making some cupcakes with Vocaloid character on top. I made some vanilla cupcakes with vanilla frosting and started to pipe the Vocaloid using butter cream - this is how they looked like, awful! With their alien eyes... Well, at least they tasted good...

Saturday, August 13, 2011

Buttermilk Cupcakes


I made this cupcakes a few days before Ramadhan. I brought some buttermilk a couple weeks earlier and I wanted to try them. I never used buttermilk before. I usually mix in some vinegar with milk when I needed one.

I was planning to make some red velvet cupcakes with the buttermilk. But, I remember that I've made those cupcakes for a few times, and it was time to try a new recipe - buttermilk cupcakes. I googled for recipes and decided to try the recipe from epicurious.

Buttermilk Cupcakes

4 cups cake flour (not self-rising)
2 teaspoons baking powder
2 teaspoons baking soda
1 1/2 teaspoons salt
2 sticks (1 cup) unsalted butter, softened
2 cups sugar
2 teaspoons vanilla
4 large eggs
2 cups well-shaken buttermilk


1. Preheat oven to 175°C.
2. Sift together flour, baking powder, baking soda, and salt in a bowl. 
3. Beat together butter and sugar until light and fluffy and beat in vanilla. Add eggs 1 at a time, beating well after each addition, and with mixer on low speed beat in buttermilk until just combined. 
4. Add flour mixture in 3 batches, beating until just combined after each addition.
Divide batter among muffin cups  and  bake for 20 minutes, or until golden and a tester comes out clean.

Wednesday, May 25, 2011

Banana Split Cupcakes


I've heard of Banana Split Cupcakes while I was watching DC Cupcake. It looks delicious, and tempting. So, I searched the net for a recipe, and decided to go with Clockwork Lemon's recipe. Of course, I made some alternation by omitting the sour cream, and adding chopped cherries and chocolate chips into the batter. The result was really good. I especially love the texture of the cake. Though the icing may be a bit sweet for my taste. I probably should experiment them using cream cheese icing next time.

Thursday, May 19, 2011

S'more Cupcakes


I wasn't really familiar with S'more. But, when I learned that they were made of crackers, chocolate and marshmallow, I thought it's going to be really good! I mean, it's going to be ooey gooey and chocolaty. How could anyone resist the temptation? But what about S'more cupcakes?


I found this S'more cupcakes recipe from bakerella, and decided to give it a try. I mean, I could always use a new recipe for experimenting. But, let me tell you how messy this cupcake is. Crushing those graham crackers and combining them with brown sugar and melted butter, marshmallow puffing up in your oven and melted and drizzling the chocolate ganache on top. They were all messy.


Is it worth it? Yes. I love the crisp from the cracker, and those ganache (you definitely have to drizzle them on top!). Love the combination! My sister and I fought for the last cupcake! I'd definitely going to try this recipe again, with some alternation, I guess.

Monday, May 2, 2011

Teddy Cupcakes


I received an order of a box of chocolate cupcakes the other day. As the cake was prepared for kids, I was told to add a bear on top of the cake.

I was working for KLIBF 2011 for the week, and preparing the cakes as soon as I got home is definitely a challenge. I have to make the mise-en-place for 4 days earlier to get the job done. I guess, the hardest part was to make the teddy figurine.


I was kind of lazy to make any fondant. So, I asked my brother to buy me some prepared fondant instead. Apparently, there's only purple fondant left. That's explained why the teddy were purple!

What do you think of the cupcake?

Sunday, April 17, 2011

Swiss Meringue Buttercream


I've never really make any Swiss Meringue Butter Cream before. I did however experimented on Italian Meringue Butter Cream. They were much difficult than Swiss, in my opinion. (I've found out about the Italian before Swiss!) So, when Aimi from burp! le feastin avec moi asked me about meringue butter cream last year, I gave her a recipe of Swiss Meringue Butter Cream.


In making Italian Meringue Butter Cream, I have to pour the sugar syrup to the beaten egg white. I have to be careful with the timing of boiling the sugar syrup and beating the egg white. There was too many works. 

In preparing Swiss Meringue Butter Cream however, all I need to do was placing the sugar and egg white in a heat-proof bowl, and  Place sugar and egg whites in the heat-proof bowl of an electric mixer over a pan of simmering water, and whisk until the sugar has dissolved. It's much more simple in my opinion.


I'm glad that the butter cream turns out really well and pretty too!


(Martha Stewart's Recipe)
500gm sugar
10 large egg whites
500gm  unsalted butter, cut into pieces
2 teaspoons vanilla extract  (or any other desired flavoring)


1. Place sugar and egg whites in the heat-proof bowl of an electric mixer. Set bowl over a pan of gently simmering water, and whisk until sugar has dissolved and egg whites are hot to the touch, about 3 minutes

2. Transfer bowl to mixer stand. Using the whisk attachment, beat on high speed about 10 minutes, until mixture has cooled completely and formed stiff and glossy peaks.

3. Add the butter, one piece at a time, and beat until incorporated after each addition. If the butter cream appears curdled after all the butter has been added, continue beating. It will become smooth again. Add vanilla, and beat just until combined.

4. Switch to the paddle attachment, and beat on the lowest speed to eliminate any air pockets, about 5 minutes.  If you have taken it out from the fridge or freezer then bring it back to room temperature and whip it before use.

Saturday, April 16, 2011

Chocolate Fudge Cupcake


I wanted to test out a recipe of chocolate fudge I got from my practical training. I remember the cake to be really good, not so sweet and seriously chocolaty. But when I read the recipe, I could sense that there were something wrong with it. The recipe used 900gm butter, and 200gm sugar. There's too little sugar!
I increased the sugar to 300gm and mix the cake anyway. It turns out to be really, really bland. Thank god, I could use the frosting to cover the bland taste of the cake.

When my brother brought the cake to his office (we had another cupcakes giveaway!), someone from his office decided to order some of the chocolate cake. I thought it would be an opportunity to correct the recipe.


I called my friend to find out the exact amount of sugar used. It turns out to be 2000gm instead of 200gm. So, that's why my cakes turns out to be really bland!

Chocolate Fudge 

900gm butter
2000gm sugar
16# eggs
450gm cocoa powder
1600gm flour
80gm baking soda
2 liter milk/water

1. Preheat the oven to 180 degrees Celsius.
2. Beat butter and sugar till creamy in a bowl.
3. Then, add in eggs one by one.
4. In another bowl, sieve the flour, cocoa powder and baking soda together.
5. Add in flour mixture to butter, and mix well.
6. Pour in milk/water into the mixture.
7. Bake the cake for 25minutes.

Sunday, April 10, 2011

Foodies by ai Velvet Cupcakes


I made some velvet cake for experiment last Friday, and gave them away to my brother's friends. I wanted to practice my frosting, and I haven't make any cupcakes for some times. Then, I got the idea to write 'Foodies by ai' on top of them (as part of advertising program).


Look at them. Aren't they sweet? I love how colorful they looked (Sprinkle's fun!)  :D


My sister arranged the cupcakes to 'I <3 Seafood by I', instead of 'Foodies by ai' and took a picture of it.

Thursday, December 2, 2010

Cupcake 101


I have always sucks in piping. So, last month, I signed up for December cupcake 101 class by Cake Connection (their class was much more cheaper from the other companies). I asked my brother if he wanted to sponsor me to go to the cupcake class, and he did :D I didn't really want to go alone, so I had my friend, Azizah to sign up as well. After all, she was still in vacation.

 This is my final 6 cupcakes! How is it?


The class was fun! Well, I get to learn a few new tips which I never learn in my culinary school. Plus, the instructor was really friendly and helpful. We got to learn a few piping tricks like rosette, star, balloons, letters, hydrangea, and leaves. I finally learn how do they makes their cake flat!


Azizah decorate these next 6 cakes. She said that decorating them looks really easy, but no, not really. I'm glad that my friend enjoyed the class too.

Sunday, October 10, 2010

Teddy Cake

Teddy Cake

There is a few stories behind this awkward looking teddy cake. 

First: it was my friend's birthday. I was thinking of giving her a cake as a birthday present. I was thinking of something big.  My friend, Ina lives 20 minutes away from me. You see, last year, I told her that I made her some cakes for her birthday. She then told me she would come to pick up the cake. She wanted to come by with a motorcycle. But then, her mother told her to use the car, thinking that it might be a big cake. When she arrived, I handed her this:
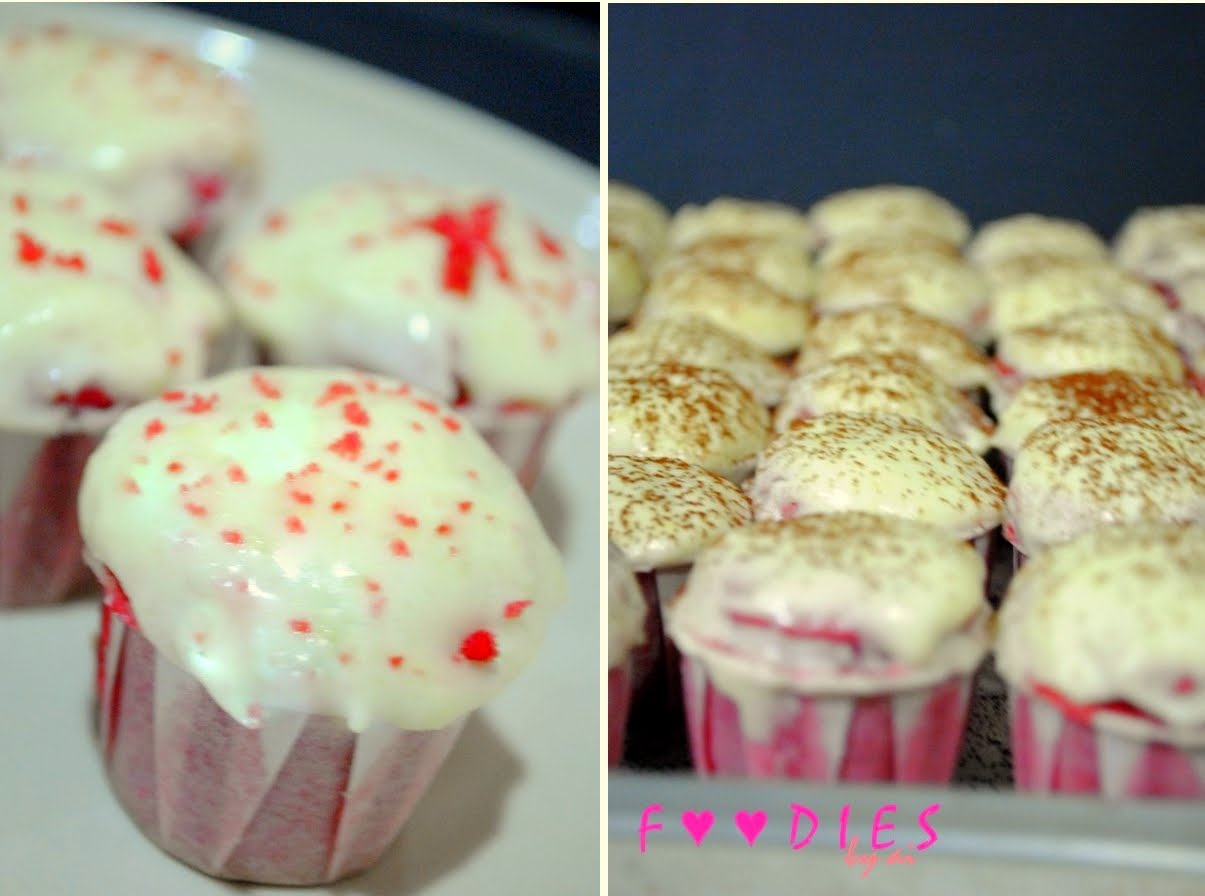
Chocolate Cupcakes

9 pieces of mini chocolate cupcakes! Somehow, I feel like I should give her a bigger cakes this year.

Second: When my cousin visited my house, she gave me this:

A present form my faraway cousin :)

Yes, that teddy cake mould, and a decorating set! My mother and I thought that we should definitely bake some cakes using this mould, and show some picture of the cake to her.

Third: I was thinking of covering the cake with some butter cream. I've seen some picture, and I thought that I should give it a try. Then, I remembered that I told my brother I'm going to make some fondant cake, and post some picture here. I didn't have enough ingredients to make some fondant, so I opt for marshmallow fondant. 

Fourth: I was thinking of making my own marshmallow. So, I put in some sugar, corn syrup, and honey into the pot, and start boiling them. However, I've forgotten about them for a bit, and the syrup hardened in the pot. I have to add in some hot boiling water to get them out.

What on earth is that?

Yes, that thing is the hardened syrup that I managed to scoop out from the pot. It looks like some broken plates. At this point, I was thinking that maybe I should learn sugar molding~

Anyway, I've managed to prepare my marshmallow fondant, and covered the cake.

Teddy Cake without decoration

I was thinking that I wanted to draw the teddy eyes, and write down 'Happy Birthday' using the edible pen marker.

Food Writer

My  mother brought me these to encourage me to bake. However, as I started to write 'H', it didn't came out as I wanted it to be. So, I had to change my plan, and began to make some royal icing.

Final product

And this is how it looks like~ The piping process with royal icing didn't go as smooth as I expected. But hey, this looks pretty okay for a first timer, right? I delivered this cake to my friend yesterday, and she was surprised to see such a big cake! Perhaps she was expecting something small like what I gave her last year XD


Cupcakes with roses

I had some extra cakes batter, and I made them into cupcakes!


P.S/ Thank you Kak Faridah for that teddy cake mould, and the decorating set X)

Saturday, July 3, 2010

Order: Chocolate Cheese Cupcakes


A few days ago my brother asked me if I could make some cupcakes for his friend. I'm not really good with cupcake decorating. So, I did my best experimenting for this one. The theme for the cupcakes was black and red. But I added in some white icing too o(>< )o o( ><)o I thought that that would make it more interesting

So, how does it look? Seems like I need to work on my decoration technique, eh?

Saturday, June 26, 2010

Experimenting: Red Velvet Cupcake

I'm still not satisfied with the velvet cake I made last time. It didn't turn up right. The chocolate coating (which is made of chocolate spread) taste is overpowering the taste of the velvet cake. So, when I went to visit a relative, I decided to make some velvet cup cake. Moreover, there were so much cheese frosting leftover in the refrigerator.

So, I pulled the bowl and whisk, grab the ingredients, and started working in the kitchen. 


Then, I waited patiently while the cake is in the oven.


... and 30 minutes later, they were sitting nicely on the kitchen counter, ready to be frosted.

 Nicely decorated velvet cupcake with cheese frosting. I sieved some cocoa powder on top of the cupcake, and they're ready to be eaten. I love those cheese frosting! It is so~ good!

LinkWithin

Related Posts Plugin for WordPress, Blogger...