Showing posts with label recipe. Show all posts

Thursday, September 18, 2014

Pomegranate Cupcakes

Baking different kinds of cupcake flavor can be fun! When my mum bought a few pomegranate from a farmer's market, I decided to take a few of those pomegranate, and turn them into cupcakes. I love the taste of pomegranate as juice. I've seen a few pictures of pomegranate cupcakes, and they are super cute with the little seeds topping! I thought it would be great to experiment with pomegranate cupcakes.


All I did was to add a bit of pomegranate juice and seed in my vanilla cupcake recipe, frost them with cream cheese frosting, and sprinkle a bit of pomegranate seed on top. The cakes are a bit yellowish, and a bit pinkish. You can add a bit pink coloring to your batter if you want it more pink.
Pomegranate Cupcakes

125g butter (softened)
2 eggs
3/4tsp vanilla essence
180gm self raising flour
1/2cup pomegranate juice
170gm castor sugar
1/4tsp salt
1/4cup pomegranate seed
Cream cheese frosting
More pomegranate seed (to decorate)
  1. Preheat oven to 180 degrees Celsius.
  2. Combine all ingredients in a mixing bowl and beat until smooth with an electric mixer.
  3. Place mixture into lined cupcake trays using a spoon, filling each until 3/4 full.
  4. Bake for 15 minutes.
  5. Cool completely before decorate.

Wednesday, October 2, 2013

Strawberry Cream Swiss Roll


I was really excited to try that decorated Swiss roll. With my first batch, the cake didn't turn out so great (I used a recipe I found on this new cookbook I bought). The design/decoration got mixed up with the batter that I have no idea what design it was on the cake. I made the second batch using a different recipes (this recipes was the one I got from my lecturer during my pastry class). The cake turned out good, but the design was 'meh'.That was why I decided to cover that not-so-attractive design with lots of whipping cream, and made myself some Strawberry Cream Swiss Roll.
Strawberry Cream Swiss Roll

45g soft flour
25g corn flour
3g baking powder
30g ovalette (a type of sponge cake stabilizer)
120g castor sugar
5nos eggs
20ml water
60g melted butter
1-2 tsp vanilla essence
whipping cream
strawberry - cut into small cubes
strawberry sauce
  1. Preheat oven to 180 degrees Celsius. Melt butter. Set aside.
  2. Add in all ingredients, except for butter into mixer. Beat well in about 5 minutes with wire whisk.
  3. Fold in butter into cake batter.
  4. You may take 1/4 batter and use it for design decoration on the Swiss roll
  5. Pour batter into sheet tray and bake for 15 to 20 minutes.
  6. Leave to cool.
  7. Spread whipping cream on cake and sprinkle some strawberry on top.
  8. Roll cake carefully.
  9. Pipe more whipping cream on top and garnish with strawberry. You may drizzle strawberry sauce on top.

I haven't been posting more recipes this recently. My excuse would be that I was busy. But the truth was that I was lazy to write/upload photos of food I made. Hmm...

Monday, September 2, 2013

Easy Fish Balls Soup


Fish balls soup was one of the easiest and simplest dish I've prepared. You can absolutely make this one whenever you're hungry and didn't have much time to cook as long as you have some fish balls in your fridge. You may add in noodles in your soup if you prefer, or you can have it with dipping sauce.
Easy Fish Balls Soup

2 litre of chicken stock
100 g celery - cut coarsely
1 large onion - cut coarsely
1 cinnamon stick
4 cloves
4 cardamom
2 star anise
6 tbsp crispy fried shallot
3 stalks spring onions, sliced
ground white pepper
salt

300g assorted fish cakes and fish balls - blanched
sliced spring onions
crispy fried shallot

1. To make the soup base, simply add in chicken stock, celery, onion, cinnamon stick, cloves, cardamom and star anise in a stock pot. Let it boil.
2. Simmer for 15 to 30 minutes.
3. Strain soup with strainer or muslin clothes.
4. Sprinkle some spring onion, crispy fried shallot, white pepper and salt to taste.
5. Add in the fish cakes and fish balls into your soup.
6. Garnish with more spring onion and fried shallot.
7. Ready to serve.

# If you need a dipping sauce, simply add in 1/2 cup of light soy sauce, 1/4 cup boiled water, 1 tsp of chilli flakes, 1 tsp vinegar, and a dash of fish sauce and/or sesame oil

Thursday, March 28, 2013

Baked Apple Rolls


I made these Apple Rolls sometimes ago when I had some extra sugar crust in the  refrigerator. I wanted to make apple pie, but I was too lazy for extra works. With apple pie, I have to flatten the dough, cut them, fit them into the mold and prepare another dough for the topping to cover the pie. I decided to make the apple pie like sardine rolls. Flatten the dough into a rectangle/square, add in the filling and roll. It was the shortcut version of apple pie. 
Baked Apple Rolls

Sugar Crust
500g Flour
250g Butter
2# Egg Yolk
50g Confectioners Sugar

Filling
4# Apples - peeled, cored, diced into brunois
1 cup Brown Sugar
1 cup apple cider
1# Cinnamon Stick
Cinnamon Powder- as desired
1/2 cup Raisins
1/2 cup dried apricots
1/2 cup dried prune
1/2 cup chopped walnuts
50g Butter
5g Corn Starch

Crust
  1. Sift flour and sugar together.
  2. Rub in egg yolk and butter into the flour mixture.
  3. Turn dough onto work surface and divide them into two balls (base and top crust) and flatten them. Cover with plastic wrap and chill for an hour. Take it out 10-15 minutes before use.
Filling
  1. Sweat diced apple with butter, apple cider and cinnamon stick.
  2. Add in dried fruits, walnut, and sprinkle cinnamon powder to your liking.
  3. Sprinkle corn starch, and let the juice thicken.
Assemble
  1. Preheat oven to 180 Celsius.
  2. Roll one pastry on a lightly floured surface into a square/rectangle.
  3. Spoon the apple filling on the pastry into a line.
  4. Roll up swiss-roll style. Seal the edges with beaten egg white.
  5. Place the rolls on a baking tray. Do not cut them into portion yet. The rolls would turn slightly messy if you did.
  6. Brush 1# egg yolk on top of each crust.
  7. Bake for 20 to 30 minutes or until rolls turn golden brown.
  8. Let cool for an hour before cutting them into bite size for serving. I like to keep them in the refrigerator for a night before serving. It was much more easier to cut them when they're chilled.


Saturday, March 2, 2013

Barbecued Beef Sandwiches


I love barbecue! I always wanted to try barbecued ribs and finally got my wish. I thought of sharing this Kansas City-Style Barbecue Sauce I found over seriouseat. The sauce was delicious! It was sweet and tangy and a bit spicy. I love it! Anyway, I got some extra barbecue sauce and I decided to make this barbecued beef sandwich.


Barbecued Beef Sandwiches

Kansas City-Style Barbecue Sauce
Sliced bread
Tenderloin - grilled and cut thinly
Watercress
Butter/spread

  1. Prepare Kansas City-Style Barbecue Sauce or any of your favorite barbecue sauce.Spread butter on any of your favorite sliced bread.
  2. Combine tenderloin with barbecue sauce in a bowl. Mix until well coated.
  3. Spread strips of tenderloin on bread. Then top with watercress (or any of your favorite salad).
  4. Ready to serve

Thursday, October 18, 2012

Hyderabad Lamb

WOW! It has been quite some times since I poste any recipes in this site! I’ve been a little bit busy these past few months, that I didn’t spend much time in the kitchen. I miss cooking and experimenting!!


After that long absence, I’m going to share a Hyderabad Lamb recipe. It was quite good. My dad, who are a fan of lamb dish love this one!  I learned this recipe from an Indian chef while I was still studying in culinary school. It was tasty, so I decided to give this recipe a try. Of course, I have to alter the recipe for a bit as the recipe actually came along with the biryani rice.

Hyderabad Lamb 

500g Lamb – cut into cube
2no. Cardamom
2 bay leaves
3 peppercorns
1 tbsp ginger garlic paste
Salt
1 pinch turmeric

 150ml Ghee
1 pinch Cumin seed
2no. Cardamom
1 stick Cinnamon
1 tsp Black pepper corn
2no. Onion, medium, chopped
10g Ginger, cut into julienne
1tbsp Ginger garlic paste
2nos. Tomato, chopped
1 tbsp Chili powder
1 tbsp Coriander powder
1 tsp Turmeric powder
2 pinch Garam masala
2 pinch Fenugreek (Kasoori methi)
150ml yogurt
30g mint leaves, chopped
30g Coriander leaves, chopped
Salt
  1. Boil 500g lamb with 2no. cardamom, 2 bay leaves, 3 peppercorns, 1 tbsp ginger garlic paste, salt and 1 pinch turmeric until 80% cooked. Turn off the heat, and toss lamb. Please don’t forget to reserve the stock.
  2. In another pot, heat ghee in medium heat. Then, add in1 pinch Cumin seed, 2no. cardamom, 1 stick cinnamon and 1 tsp Black pepper corn. Stir until fragrant.
  3. Stir in chopped onion, julienne ginger, 1tbsp Ginger garlic paste and chopped tomato. Cook for five minutes.
  4. Add in chili powder, coriander powder, turmeric powder, garam masala, fenugreek and salt. Cook until they reached into gravy texture. 
  5. Stir in boiled lamb and the stock. Cook for another 5 minutes.
  6. Add in yogurt, mint and coriander. Cook until the stock turn into gravy. Add in more salt if necessary.
  7. Serve with biryani rice.


Monday, August 27, 2012

Peanut Butter & Chocolate Cookies!


I rarely bake cookies. When I do bake cookies, it is usually for the eid ul fitr preparation. I have lots of leftover peanut butter sitting on my shelf. And his year, I baked some peanut butter cookies drizzled with chocolate!


First, mix the dough. Shape the dough into balls, and roll them in sugar.


Arrange them neatly on tray. Press the top gently using a fork.


Then, press halves peanut on top. Bake. Cool. Then, drizzle melted chocolate on top. This process will help the peanut to stick to the cookies.


Peanut Butter & Chocolate Cookies
(recipe adapted from Bake at 350 Peanut Butter Blossoms)

1/2 c. butter
3/4 c. creamy peanut butter
1/3 c. castor sugar/fine granulated sugar (plus more for rolling)
1/3 c. light brown sugar
1 egg
1 tsp baking soda
1/2 tsp coarse salt
1 tsp vanilla
1 & 1/2 c. all-purpose flour
1 bag peanut - halves
1 bar compound chocolate for drizzle - melted

1. Line cookie sheets with parchment paper (or use a non stick baking tray).  Preheat oven to 175°Celsius.

2. Using a whisk, sift flour, salt and baking soda in a bowl.

3. In a new bowl, beat butter and peanut butter using the paddle attachment. Add in both sugars and beat until smooth. Then, add in egg and vanilla. Next, add in flour. Mix until well combined. Scrape the bottom and side of bowl once or twice to ensure that all ingredients are well mixed.

4. Shape the dough into1 inch balls and roll them in the extra sugar. Place coated dough balls on the baking tray. Press the top of balls with a fork gently to get the pattern. Then, pressed halves peanut on top.

6. Bake cookies until they are a very light golden color, in about 10 minutes to 12 minutes. Meanwhile, melt the compound chocolate in a microwave for about, 30 seconds.

7. Transfer cookies to a cooling rack to cool completely. Then, drizzle the chocolate. Wait until the chocolates are well set. Enjoy!

Monday, July 16, 2012

Tuna and Sweet Corn Muffins


I never make any savory muffins before. When I saw the pictures and recipe of Tuna and Sweet Corn from Happy Home Baking, I was really tempted to try them. I made these muffins and gave it away to a few relatives when my mother was visiting them. I was glad that my mother like how they taste like. It's good to bake something savory once in a while.

Tuna and Sweet Corn Muffins
(Altered from Happy Home Baking)

60g tuna chunk (I used canned tuna chunk in olive oil)
50g sweet corns kernels (I used canned)
half of a medium-size yellow onion (finely chopped)
some vegetable oil

180g flour
2 tsp baking powder
80ml vegetable oil
25g granulated sugar
1/4 tsp salt
2 tsp chili powder (I like it a bit spicy)
1 large egg, lightly beaten
120g milk

  1. Saute chopped onion with some vegetable oil over medium to low heat until the onion turns soft and translucent. Leave to cool. 
  2. Drain tuna, break into smaller pieces with a fork, set aside.
  3. Sieve together the dry ingredients - cake flour, baking powder, sugar, salt and chili powder using a wire whisk, set aside. 
  4. In a mixing bowl, beat all the wet ingredients - oil, egg and milk.
  5. Using a spatula, fold in the wet ingredients into the dried ingredients. Then, fold in the tuna chunks and sweet corn kernels.
  6. Spoon batter into paper cups or muffin pans lined with paper liners. 
  7. Bake muffins at 180degrees C for 18 ~ 20mins or until a tooth pick inserted into the centre comes out clean. (Note the muffins will only be very lightly browned due to the small amount of sugar used.) Best served hot or warm from the oven.


Tuesday, June 19, 2012

Passion Fruit Cupcake


I first heard of passion fruit during my practicum training four years ago. I had to prepare a passion fruit mousse. I remember that they were using passion fruit puree. So I have absolutely no idea how a passion fruit looks like.... Imagine how excited I am when I saw this fruit in the market! I bought them without really knowing how to tell if they're ripen or not, and not knowing how to eat this fruit. So I decided to cut them into half, and eat the inside. Passion fruit had a tart and acidic taste with aromatic flavors. I decided that I'm going to experiment making passion fruit cupcakes. I thought it's going to taste perfect -- and summer-ish.


Passion Fruit Vanilla Cake (modified from Angry Cherry's recipe)

1 & 3/4 cups all-purpose flour
1 teaspoon baking powder
1/2 teaspoon salt
3/4 cup unsalted butter, softened
1 cup sugar
3 large eggs, room temperature
2 teaspoons vanilla extract
1/4 cup passion fruit puree
1/4 cup milk (I used coconut milk)

1. Preheat the oven to 350°F/175°C
2. Sift together the flour, baking powder, and salt. Set aside.
3. Cream the butter and sugar together until light and fluffy. Beat in the eggs, one at a time, making sure the batter is completely smooth and the each egg is incorporated before adding the next.
4. Stir in the vanilla extract passion fruit puree and milk.
5. Add the flour slowly and fold the ingredients together.
6. Divide the batter equally between the muffin cups.
7. Bake for 30 ~ 32 minutes, or until a cake tested inserted into the middle-most cupcake comes out clean.
8. Allow to cool to completely before frosting.

I frosted the cupcake with creme cheese frosting and spooned a bit more of extra puree on top. The cake itself taste really good (especially when they are still warm out of the oven)!

What would you experiment to do with this fruit?

Visit Angry Cherry to learn to make a passion fruit frosting!


Monday, June 11, 2012

Profiteroles


It's been a while since I post anything here.

Anyone miss me? :D

I was busy with wedding and all that preparation last few weeks and it's finally over! Frankly, I miss being in the kitchen to cook/bake something. I miss experimenting with food! I made some profiteroles the other day and thought of sharing them with you :)


Profiteroles are small choux pastry with hollow rounds.  Profiteroles are smaller version of cream puff. It is usually split in half and filled with whipped creams, ice cream or pastry cream (I usually filled them with pastry cream. Then, topped with chocolate sauce or dusted with powdered sugar.


Profiteroles

180ml water
115g butter
10g sugar
115g flour
2# eggs
2# egg white
  1. Reheat oven to 220 degrees Celsius.
  2. Bring water, butter and sugar to boil.
  3. Turn off the heat and add in flour all at once.
  4. Cool the dough and transfer into a mixing bowl.
  5. Whisk in eggs one by one. Then, mix in egg white.
  6. Add in dough into piping bag and pipe them onto baking sheet, spacing them a couple of inches apart.
  7. Bake in profiteroles in the oven for 10 minutes at 220 degrees Celsius..
  8. Reduce heat to 190 degrees Celsius and bake until the profiteroles are golden.
  9. Cool them before filling them with desired fillings such as pastry cream, ice cream or whipped cream.
  10. Pour warm chocolate sauce or dust with powder sugar before serving.


Thursday, May 17, 2012

Chicken Stock


I thought that I wanted to post something other than sweets/dessert this time. It seems that my blog is overflowing with pictures and recipes for sweets! So, this time, I decided to write on stock. According to Professional Cooking 5th Edition, Stock may defined as a clear, thin liquid flavored by soluble substance extracted from meat, poultry and fish and their bones, and from vegetables and seasoning. 


It is a liquid which we often use in sauce and soup making. Sometimes, I use them as a seasoning in preparing stir-fry vegetables and in preparing pasta dish. The common ingredients in preparing stocks are bones (the major ingredients), meat, mirepoix (combination of onions, carrots and celery), herbs and spices. Some chefs would use scraps and leftovers from other vegetables. It is a great way to not let ingredients to go to waste!


 You may prepare them and keep them in a container to be use later. Besides, I think that using chicken stock is a whole lot better and healthier than using those chicken cube or chicken powder sold in the market.

Did you make your own stock or would you prefer to use the pre-made, convenience chicken cube and such?

Chicken Stock

Leftover bones and skin from raw chicken carcass
Cold Water
Celery
Onions
Carrot
Herbs (parsley, bay leaf, peppercorn)


  1. Blanch the bones - Rinse bones in cold water, place them in stockpot and cover with cold water. Bring to boil. Drain the bones and rinse them well.
  2. Place the bones in the stockpot and cover with cold water. Bring to boil and reduce to simmer. Skim the scum (the impurities floating in the stock) carefully.
  3. Add the mirepoix and other herbs and simmer for 3 to 4 hours. Skim the surface when necessary and add water to cover bones if necessary.
  4. Strain liquid though a china cap with cheesecloth.
  5. Cool the stock, and keep them refrigerate until needed.
Tips:

* Don't add in salt in stock.
* You may add in scraps or leftover vegetables into your stock. Sometimes I add in leek and mushroom stalks in my stock.

Sunday, April 29, 2012

Apam Polka Dot, Plain


Remember the last time I post on Experimenting: Apam Polka Dot? Well, I'm back to experiment with them again this week. While weighing the ingredients, I couldn't help but to be reminded to sponge cake. There were some resemblance of ingredients between them. Could Apam Polka Dot be translated to Steamed Sponge Cup Cake? Nah... I think it's better to call it as Apam Polka Dot.


And making them was quite simple too! First, you prepare the batter and divide them into a few portion. Drop in a few drops of your preferred food coloring and mix them well.


Next, arrange mini paper cups into a plastic mold or small plastic cup (or anything as above). The last time I made this, I arranged them into a mini tarts mold. And it didn't look as pretty as using these small plastic mold. 


Then, add in the batter into a piping bag, and piped the batter into paper cup until it was 3/4 full. Or you could use a teaspoon. But using a piping bag is neater. Then, use another piping bag with different color of batter and pipe small dots on top of batter.


If you're feeling a bit adventurous, you may pipe any other design that you like. For example, flower.


Or cute and weird emoticons like these...


Or perhaps attempt to pipe them into a lady bird design, and fail as I did...


Then, arrange them nicely on tray, and steam them over low fire for 10 to 15 minutes. Steaming them over  high heat would ruin the design on Apam. If you're using a steamer like mine, make sure that you cover the lid with a clean towel to prevent the steamed water from dripping down to Apam.


And this is how they looked like when they're done! Don't you think they looked better than the first time I did it? They're a bit fluffy too! 

Apam Polka Dot
(Adapted and Translated from Apampolkadot.com)

275g flour
220g castor sugar
150ml milk or evaporated milk
3 tsp baking powder
3# egg white, cold temperature
3# egg yolk, cold temperature
1 tsp ovalette (cake stabilizer)
1 tsp vanilla essence (I used extract)
Food coloring 

  1. Combine flour and baking powder.
  2. In another bowl, beat egg white until fluffy.
  3. Add in ovalette, egg yolk and vanilla essence. Mix well. Add in sugar.
  4. Add in flour and milk alternately into the batter.
  5. Divide batter into a few portion and add in a few drop of your preferred food coloring. Mix well
  6. Add in batter into a piping bag. Then, pipe the batter into the paper cup until it is 3/4 full.
  7. Grab a piping bag with different color and pipe small dot on top.
  8. Steam for 10 to 15 minutes.
  9. Let it cool before serve. Or keep them into an air tight container to prevent the Apam from harden.

Friday, April 20, 2012

Chicken Stew with Pasta

I made this chicken stew during my cousin's visit. I figured that my cousin's kids would love chicken stew with pasta and lots of cheese... And I'm a fan of dishes with cheeses myself. This dish is very easy to prepare and time saving. I love that ooey gooey, hot melting cheese on top of the chicken stew & pasta.

Chicken Stew with Pasta

1/2 chicken - cut into desired size
40g tomato puree
2 tbsp fresh grounded black pepper
1 inch fresh ginger

1 can tomato soup
1 medium onion - cut into wedges
1 medium carrot - cut into desired size
baby corn
2 medium tomato - cut into wedges
salt to taste

4 cups pasta - boiled, tossed
1/2 cup grated mozzarella
1/2 cup grated parmesan
1/2 cup grated cheddar

1. Marinade chicken with tomato puree, black pepper and fresh ginger for 30 minutes.
2. Add in chicken into a soup pot over medium heat. Wait until the juice from chicken came out a little bit.
3. Add in tomato soup and cook for 15 minutes. Add in onion, carrot and baby corn.
4. When the stew is almost cooked, add in the tomatoes. Salt to taste.
5. To serve, add in pasta with stew. Then, sprinkle mozzarella, parmesan, and cheddar generously. Best served hot.

Monday, April 16, 2012

Vanilla Sponge Cake


I made these sponge cake for my parents' anniversary last week. It's been quite some times since I made these sponge cake. The last time I made them, I was still in the culinary school.

Aren't they adorable? And fluffy too...


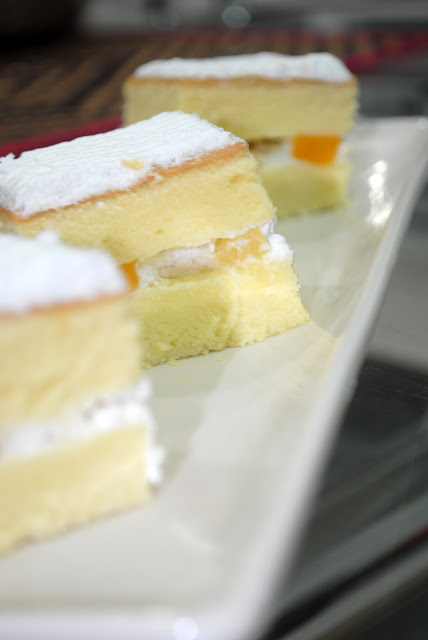
I made two trays of them and decided to give half of them to family's friends and the save some for my family. The first cake was filled with whipped cream and cocktail fruits and frosted with more whipped cream - and these batch were given away.


The second one was filled with whipped cream and blueberry fillings (my mother likes blueberry), frosted with more whipped cream and topped with shaved chocolate - I save this one for my mom

They're not too sweet kind of treats, which is good as my mother didn't favor sweets much.

Anyway, Happy Anniversary Mom & Dad!

Vanilla Sponge Cake

8 eggs
250g castor sugar
250g soft flour
100ml water
25g ovelette
150g butter, melted
1tsp baking powder
1tbsp vanilla extract

1. Preheat your oven to 180 degrees Celsius.
2. In a bowl, combine all ingredients, except for butter.
3. Beat well in about 3 to 5 minutes.
4. Fold in melted butter into the batter.
5. Pour batter into a pan and bake for 30 minutes.
6. Decorate and serve :)

Tuesday, April 10, 2012

Kimchi Fried Rice


It still amazes me on how much dishes you could create with kimchi. This time, I made Kimchi Fried Rice when I was super hungry and had limited ingredients in the refrigerator. It’s quick, cheap, delicious and nutritious.

Kimchi Fried Rice

½ cup Napa Kimchi (chopped)
1/3 cup Chopped Onion
1 tsp Gochujang
1 tsp Soy Sauce
1/3 cup Sliced Beef/Chicken (I used Sausages)
1 cup Rice
Salt to taste
Sesame Oil
1 # Fried Egg

1. Heat pan with some oil. Add in chopped kimchi and onion. Stir for 3 minutes.
2. Add gochujang (Korean hot pepper paste) and soy sauce in the pan. Then, add in sliced meat.
3. Add in rice and coat well. Add in salt to taste.
4. Transfer rice to a plate and drizzle some sesame oil on top.
5. Top rice with fried egg before serving.

Monday, March 26, 2012

Chocolate Cake


I made this chocolate cake for someone's birthday last weekend. I opt to coat them with whipped cream to give them a light taste.Then I sprinkled some chocolate chip between the layers, and frosted them with more whipped cream.


Somehow, I managed to make my cake looks cheap than it appear to be. And I really, really, really need to improve my writing skills. (And I forget to dry the maraschino cherries before putting them on cake!! What am I thinking??) I think I like them without any coating and decoration. It looks nicer that way. 

To whoever that received the cake, pardon me for my bad handwriting and cake decoration technique.

Chocolate Cake

250g butter
350g castor sugar
75g cocoa powder
175g cake flour
1tsp baking powder
100ml buttermilk
1 tsp vanilla
3# eggs

1. Preheat the oven to 175 degree Celsius.
2. Sift cocoa powder, cake flour and baking powder in a bowl. Set aside.
3. Beat butter and sugar in another bowl until it's fluffy. Then, add in eggs one by one. Beat in vanilla.
4. Alternately beat in flour mixture and buttermilk into the butter. Mix just until combined.
5. Bake for 35 to 40 minutes or until a toothpick inserted comes out clean.
6. Let it cool and serve. You can have it plain, frosted with whipped cream, chocolate ganache or chocolate butter cream—anyway you like.


They look nice as cupcakes too! :)

Wednesday, March 14, 2012

Brownies


I made this brownies for someone's kids birthday. This brownies is a bit different than the steamed brownies I made last month. Steamed brownies is a bit chewy, and this one had a nice crumbs on top. It's soft and not too sweet. This one is a plain brownies. I omitted the walnuts as I know some kids didn't really like them. But I bet it would taste really good with vanilla ice cream. YUM!


Okay, I made two batches actually. The first one is plain brownies. And the second one was topped with chocolate ganache and white and chocolate chips. 

Brownies (Adapted from Professional Cooking 5th Edition)

450g Unsweetened Chocolate
675g Butter
675g Eggs
1350g Sugar
7g Salt
30ml Vanilla Essence
450g Cake Flour
450g Chopped Walnut

1. Preheat your oven at 180 degrees Celsius.
2. Melt unsweetened chocolate and butter using double boiler, or microwave. Set aside.
3. Blend eggs, sugar and salt. Do not whip. Then, add in vanilla.
4. Blend in melted chocolate into eggs and sugar mixture.
5. Sift in cake flour into the chocolate mixture. Then, fold in chopped walnut.
6. Pour into a greased and floured 8x8 inches pan (you might need more than one pan), or a bigger pan and bake for 35 minutes or until a toothpick inserted comes out clean.
7. Let it cool and serve. You can have it plain, topped with frosting or served with ice cream. Anyway you like it :)


Tuesday, March 6, 2012

Grilled Sardine with Orange & Pasta Salad


I'm no expert on fish. To tell the truth, I rarely had any chance to clean any fish. In my memory, there were only once where I had to clean a fish which was during my basic western class (though, I did this with a friend). In fact, if they asked me to clean any fish during my final exam in Culinary study, I would fail miserably. I probably wouldn't be able to have my diploma, or my degree. It's not that I didn't know how to do it. It was just that, I never had much opportunity to do it (or, I seemed to be avoiding them).

I made this Grilled Sardine as part of a challenge for myself to clean a fish. The combination of sardine & orange is really refreshing.

Grilled Sardine with Orange & Pasta Salad (inspired from BBC Good Food)

1 tsp ground black pepper
1 tsp orange zest

4 fresh sardine fillets

2 oranges
2 tsp orange juice
2 cups boiled Rotini Pasta (spiral)
1 cup spinach - washed, tossed
1/2 cup coriander leaves
1 shallot, thinly sliced
salt & pepper

1. Lightly slash the skin of sardine and marinade fillets with ground black pepper, orange zest and salt. Keep refrigerated for an hour.
2. Heat the grill.
3. Segment the orange. Peel away any white pith.
4. Grill sardine, skin side up until crisp and cooked through in about 5 minutes.
5. Toss in cooked rotini pasta with orange juice, segmented orange, shallot, coriander leaves and spinach.
6. Divide pasta between 2 plates, and top pasta with grilled sardines.
7. Ready to serve.

Sunday, February 19, 2012

Ayam Masak Lemak Cili Api


I was never good with Malaysian cooking. I rarely cook any Malaysian food, although I'm a Malaysian. My mom is much better with Malaysian cooking, and I figured that it would be better to let her cook Malaysian dishes.

But, I learned this recipe while I was in my culinary school. I didn't learn this from any of my lecturers, though... I learned this from a friend who was really, really into spicy food. My friend told me that Ayam Masak Lemak Cili Api (can I translated this as Chicken cooked with Bird Eye Chili in Coconut Gravy?) is one of the simplest dishes. It was easy. Even for a Malaysian noob cooks like me...

My friend taught me to add in 25 stalks of bird eye chili. But, I reduced it to 20 stalks instead (as not everyone in my family likes spicy food). But it was still really spicy. At least for my little sister it is. She end up sweating, and she ran straight to the kitchen with a glass of iced water to help her reduce the spiciness. It was amusing to see that happen once in a while, though... :D Okay, I should probably reduce the amount of those chili the next time I make this.

Ayam Masak Lemak Cili Api (Chicken cooked with Bird Eye Chili in Coconut Gravy)

1 whole chicken - cut into small parts.
2 stalk lemongrass - bruise the lower bulb
4# potatoes - cut into medium size
2# tomatoes - cut into wedges
1 piece asam gelugor
1 cup pure coconut milk
salt to taste

2# red onion
3# shallots
3# garlic
1 inch ginger root
10-25 bird eye chili - depends on your preference spice level.

1. Blend red onion, shallots, garlic, turmeric root, ginger root and bird eye chili in a food processor.
2. In a soup pot, mix in the blended ingredients with chicken, lemongrass and potato. Combine well on medium heat until the juice came out from chicken. Stir occasionally.
3. Pour in coconut milk and add in asam gelugor.
4. Cook until the potatoes are a bit tender on low heat. Add in salt to taste.
5. Add in tomatoes just before serving. Best served with hot, white rice.

Sunday, February 5, 2012

Steamed Brownies


The first time I had a steamed brownies was last year during my visit to Bandung, Indonesia. A friend recommended me to try Bandung's steamed brownies. I bought 1kg of them. I gave half of them to a friend as a souvenir and divided the other half to my family members. And it wasn't enough. One portion of Bandung's steamed brownies are not going to satisfy you. You just gotta have more than one portion. That's when I decided to try and make my own steamed brownies. It wasn't as good as the one I bought in Bandung, but, it wasn't that bad either.


Steamed Brownies

200g butter
200g dark chocolate, chopped (don't use cheap chocolate, or it wouldn't taste as good)
200g flour, sieved
4# eggs
150g castor sugar
1/4tsp salt
100g walnut, chopped (optional)

1. Melt butter and chocolate in microwave, and let it cool for a while.
2. Mix eggs and sugar until fluffy.
3. Fold in flour into the egg mixture with a spatula. 
4. Then, add in the melted chocolate into the eggs mixture. Mix well. Fold in walnut.
5. Pour batter into a 10x10 baking tray, and  steam for 15 to 30 minutes, or until the toothpick came out clean.
6. Let the brownies cool, and refrigerated for at least two hours before served.

LinkWithin

Related Posts Plugin for WordPress, Blogger...