Showing posts with label Experiment. Show all posts

Thursday, September 18, 2014

Pomegranate Cupcakes

Baking different kinds of cupcake flavor can be fun! When my mum bought a few pomegranate from a farmer's market, I decided to take a few of those pomegranate, and turn them into cupcakes. I love the taste of pomegranate as juice. I've seen a few pictures of pomegranate cupcakes, and they are super cute with the little seeds topping! I thought it would be great to experiment with pomegranate cupcakes.


All I did was to add a bit of pomegranate juice and seed in my vanilla cupcake recipe, frost them with cream cheese frosting, and sprinkle a bit of pomegranate seed on top. The cakes are a bit yellowish, and a bit pinkish. You can add a bit pink coloring to your batter if you want it more pink.
Pomegranate Cupcakes

125g butter (softened)
2 eggs
3/4tsp vanilla essence
180gm self raising flour
1/2cup pomegranate juice
170gm castor sugar
1/4tsp salt
1/4cup pomegranate seed
Cream cheese frosting
More pomegranate seed (to decorate)
  1. Preheat oven to 180 degrees Celsius.
  2. Combine all ingredients in a mixing bowl and beat until smooth with an electric mixer.
  3. Place mixture into lined cupcake trays using a spoon, filling each until 3/4 full.
  4. Bake for 15 minutes.
  5. Cool completely before decorate.

Tuesday, February 4, 2014

Chocolate Mousse


My friend asked me if I could make chocolate mousse. I know that I've made them when I prepared the Sarawak Layered Cake Charlotte years ago. This mousse recipe I contain gelatin powder.

Remember this?
So, while I browsed through some recipe books and some on the internet, I found a lot of  recipes that used meringue, and no gelatin powder. I decided to make a little experiment by combining in a little bit of this and that.

Chocolate Mousse

150 g Chocolate - dark chocolate, bittersweet - cut into small pieces
200ml whipping cream
50g castor sugar
2 egg yolks
2 egg white

  1. Melt chocolate in double boiler. Leave it cool to room temperature. Use the high quality chocolate for a tastier result.
  2. Whipped cream with 10g of sugar until peak.
  3. Beat egg yolk in another bowl with another 10g of sugar until foamed.
  4. Whisked egg white in another bowl with the remaining sugar.
  5. Using a spatula, fold in egg yolk into the chocolate. Then, fold in whipped cream followed by egg white.
  6. Spoon the chocolate mixture into ramekins.
  7. Keep refrigerated overnight.
  8. Serve mousse with whipped cream. You may decorate with chocolate powder, chocolate rice or serve it plain.

Thursday, November 1, 2012

Experimenting: Consommé


Consommé is a type of clear soup made from richly flavored stock or bouillon that has been clarified. Consommé should be strong, rich and full-flavored. It's basic ingredients are Lean ground meat, egg whites (which is used for clarifying) mirepoix and acid ingredients (like tomato or lemon juice).

I have attempted to make this soups three times. Twice when I was a culinary students. (I challenged myself to prepare this soup and failed. After all, consommé is considered to be one of the difficult soups to prepare among us students). And recently, I've tried to make consommé again. And on the third attempt, I believe that I have failed. Again. Haha...

The first and second consommé I made weren't clear at all. They were cloudy. And the third one is a bit clearer than the previous two, but it seems that it wasn't thoroughly strain. (yikes!) You can see the picture there that it wasn't strained very well.

Oh well... I should attempt to make this soup again when I had the time to. Have you tried to make consommé before? How did yours turn up to be?

Friday, August 17, 2012

French Fries with Onion


Potatoes product is one of my favorite ingredients. And French Fries is one of the dish that I've experimented for many time. I've always wanted to make that perfect, crispy homemade french fries, and haven't really succeed.

Anyway, I made this French Fries with Onion the other day. I wanted to combine two of my favorite potato recipe - French Fries and Lyonnaise Potato (a French dish of sliced pan-fried potatoes and thinly sliced onions, sautéed in butter with parsley). 

French Fries with Onion

3 nos. Potato
1 medium onion - sliced thinly.
salt to taste
black pepper to taste
1 tsp vinegar
oil

1. Preheat oven. Wash and scrub potato.
2. Arrange potato on baking dish. Drizzle some olive oil and salt. Bake potato with skins.
3. Let potato cool for a few minutes. 
4. Cut potato into finger size. Combine fries with salt, pepper, vinegar and onion. Marinade for 30 minutes.
5. Heat oil. Deep fried fries until brown (along with sliced onion).
6. Serve while it is still hot!

Homemade fries are very easy to prepare, don't you think? I love French Fries with Onion. But I think it needs to be a little more crispy. I'm going to experiment and research a bit more on how to make my fries crispier! Do share with me if you have any tips to make your fries crispy :)

Related recipe:

Saturday, July 28, 2012

My American Burger Dream #1


I'm a fan of the American food reality TV show, Man v. Food where food enthusiast, Adam Richman explores big food offerings from different American city. What always amuse me was the burger! The size and portion. And how delicious Adam Richman made it looks like. It gives me the illumination of how tasty American burgers are. The illumination that that is how burger should look like. Big! With lots and lots of toppings! I want that. So, I decided to start my own American Burger Dream to make a perfect burger from learning through the show, and various recipes. And here's my first attempt.


I sort of wanting this burger to be healthy. So I made everything from scratch. And that includes the burger bun! I started the burger with pan frying (since I don't have a grill) the burger.


Then, I dipped the burger into beef broth for a short while. I thought it could make the meat a bit juicier. Although, I'm not sure if that helps much. lol


Take the burger back into the pan, and topped them with brown onions (I sauteed them for a while) and red chilies to make them a bit, spicier.


Then, top them with a slice of cheese. (I used cheddar!)


And cover them with a small bowl to steam them. To make the cheese melt a little bit. Then, count to five. Steaming the cheese any longer will totally melt the cheese, and well... your cheese will kind of disappeared. Trust me, I've tried.


Here's what it looks like when the cheese melted. Then, I topped them with coleslaw. 


And here's how it looks like after a first (or a few) bites. There's some home made fries and more coleslaw as the side dishes. The burger was a bit too big (or too tall) for me, and it's hurt to open my mouth and eat them. The taste wasn't so good though... But, I'll keep trying to perfect them later.

Tuesday, June 19, 2012

Passion Fruit Cupcake


I first heard of passion fruit during my practicum training four years ago. I had to prepare a passion fruit mousse. I remember that they were using passion fruit puree. So I have absolutely no idea how a passion fruit looks like.... Imagine how excited I am when I saw this fruit in the market! I bought them without really knowing how to tell if they're ripen or not, and not knowing how to eat this fruit. So I decided to cut them into half, and eat the inside. Passion fruit had a tart and acidic taste with aromatic flavors. I decided that I'm going to experiment making passion fruit cupcakes. I thought it's going to taste perfect -- and summer-ish.


Passion Fruit Vanilla Cake (modified from Angry Cherry's recipe)

1 & 3/4 cups all-purpose flour
1 teaspoon baking powder
1/2 teaspoon salt
3/4 cup unsalted butter, softened
1 cup sugar
3 large eggs, room temperature
2 teaspoons vanilla extract
1/4 cup passion fruit puree
1/4 cup milk (I used coconut milk)

1. Preheat the oven to 350°F/175°C
2. Sift together the flour, baking powder, and salt. Set aside.
3. Cream the butter and sugar together until light and fluffy. Beat in the eggs, one at a time, making sure the batter is completely smooth and the each egg is incorporated before adding the next.
4. Stir in the vanilla extract passion fruit puree and milk.
5. Add the flour slowly and fold the ingredients together.
6. Divide the batter equally between the muffin cups.
7. Bake for 30 ~ 32 minutes, or until a cake tested inserted into the middle-most cupcake comes out clean.
8. Allow to cool to completely before frosting.

I frosted the cupcake with creme cheese frosting and spooned a bit more of extra puree on top. The cake itself taste really good (especially when they are still warm out of the oven)!

What would you experiment to do with this fruit?

Visit Angry Cherry to learn to make a passion fruit frosting!


Saturday, May 5, 2012

Experimenting: Chocolate Pasta with Vanilla Sauce


I have some egg yolk leftover from making meringue. I was in dilemma as I didn't know what to do with them. I couldn't simply throw them away, could I?

So I decided to do a bit of experiment - Chocolate Pasta with Vanilla Sauce. It sounded delicious and they would be perfect with strawberries I had.

I measured 100g of flour, used 2 egg yolk and 50g of melted chocolate and combined them together until they became a dough (I knead them with hands). Then, I rolled them and cut them into strips. Next, I boiled the pasta for 5 minutes and let it cool. And ta-dah! They became chocolate pasta (or is it pasta chocolate? Pasta au chocolat sounds great too!). Served them with cold vanilla sauce and preferred fruits.

They would taste good if I rolled the pasta a bit more thinly... or perhaps boiled them for a bit more longer? It was a nice experimenting, though...

What would you do with leftover egg yolk?

Tuesday, April 3, 2012

Experimenting: More Macarons


I have lost my counts on how many attempts I made for macarons. I have tried various of recipes and techniques featured in blogs, magazine and books. If you read my previous post, Experimenting: Macarons and Experimenting: Macaron 2, (well, those are two of my early attempts to make Macarons) you would know that I didn't succeed in my first try.


There were recipes that turned out to be sweet and not so sweet. There were recipes that require me to make sugar syrup. There were recipes that require me to preheat the oven in high heat, and reduce the temperature once the macarons tray went into the oven. And there were this baking technique where I was supposed to put a wooden spoon to ensure that the oven wasn't properly shut.


But most of my experiments weren't so successful. I burnt some of my macarons and some of them sunk. And all I wanted was for my macarons to have that glossy, smooth surface and for them to have those feet. Those ruffles feet.


When I failed, some of those macarons ended up in the dumpster because they were not edible. Sometimes I gave them away to a friend because she didn't mind how it looked like. But every time something went wrong with my macarons, I was more determined to try them again and again. 


After countless of attempts, my macarons finally looked like this. Almost smooth surface and ruffles feet. I was really, really happy when I saw those ruffles feet. I decided to draw some smiley and funny faces (find that troll face my little sister drew for me!) on the surface with edible ink pen. But of course, I need to practice more to ensure that they have the standard size... And I hope that someday, they would turn out to be perfect! 

Oh well...

Wish me luck!

Monday, March 19, 2012

Experimenting: Apam Polka Dot


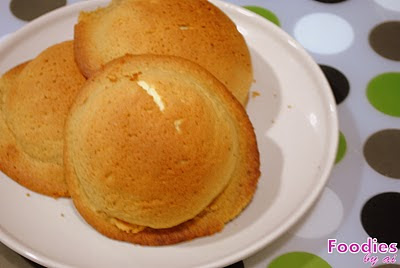
I'm not quite sure what does this cute little thing is called in English. But in my Malaysia, we called this Apam Polka Dot. Recently, these Apam gained its popularity due to its cuteness. These Apam are available in plain vanilla or with fillings such as blueberry & strawberry fillings. But I like it plain.

What do you think of these Apam? Aren’t they cute? This is my first time making these Apam. I think, it would look much better if the Apam fully filled in the cups. I’ll post the recipe the next time I make them again :)


Click here to see the recipe

Saturday, October 29, 2011

Experimenting: English Muffins


I've always wanted to try making English Muffins. When I found a recipe of English Muffin from Corner Loaf, I decided to give it a try. I mean, Corner Loaf's English Muffins looks really good!

Don't let your eyes deceive you, though. My muffins turn out to be under cook in the inside (I wish I snap a picture of how the inside to show you how it looks like, but I didn't). I was disappointed! But, I decided that I shouldn't give up. Maybe I should try and make them again... since there's a lot of cornmeal left :D


Monday, September 12, 2011

Experimenting: Vocaloid Birthday Cupcakes


My little sister is a fan of Vocaloid. So, I thought of making some cupcakes with Vocaloid character on top. I made some vanilla cupcakes with vanilla frosting and started to pipe the Vocaloid using butter cream - this is how they looked like, awful! With their alien eyes... Well, at least they tasted good...

Thursday, August 25, 2011

Experimenting: Chocolate Flavored Marshmallow


I bought a candy thermometer a few months ago to start off my candy making experiment. And last week, I finally got the chance to use them to make some chocolate flavored marshmallow. (If you remember, last year, I've experimented with Chocolate Dipped Marshmallow)


And here's the final result! The marshmallow was a bit flat - I should use a smaller baking tray to mold them next time! I wasn't really happy with the marshmallow. I guess, they were a bit too soft - it melts in your mouth. Maybe I should add in less liquid next time. I'm going to continue experimenting this until I get the recipe right.

Sunday, July 24, 2011

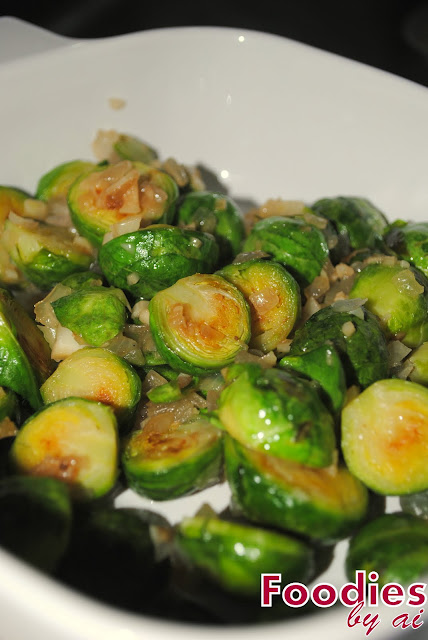
Sauteed Brussels sprouts


I bought some Brussels sprouts out of curiosity. I've never cooked them before. And my instinct told me that I should do some experiment with this. Plus, cooking with ingredients I've never used it fun! So, I googled the internet looking for some recipes. My friend told me that they can be sauteed with garlic. 


I've found a recipe from Cook Sister! and decided to give it a try. I had to be really careful in cooking them too. Well, my research told me that over cooking these vegetables would make them bitter. And most people were traumatized with Brussels sprout after experiencing those bitter taste. And that scared me! I was quite lucky that they didn't turn out  too bitter, though...

Wednesday, May 25, 2011

Banana Split Cupcakes


I've heard of Banana Split Cupcakes while I was watching DC Cupcake. It looks delicious, and tempting. So, I searched the net for a recipe, and decided to go with Clockwork Lemon's recipe. Of course, I made some alternation by omitting the sour cream, and adding chopped cherries and chocolate chips into the batter. The result was really good. I especially love the texture of the cake. Though the icing may be a bit sweet for my taste. I probably should experiment them using cream cheese icing next time.

Thursday, May 19, 2011

S'more Cupcakes


I wasn't really familiar with S'more. But, when I learned that they were made of crackers, chocolate and marshmallow, I thought it's going to be really good! I mean, it's going to be ooey gooey and chocolaty. How could anyone resist the temptation? But what about S'more cupcakes?


I found this S'more cupcakes recipe from bakerella, and decided to give it a try. I mean, I could always use a new recipe for experimenting. But, let me tell you how messy this cupcake is. Crushing those graham crackers and combining them with brown sugar and melted butter, marshmallow puffing up in your oven and melted and drizzling the chocolate ganache on top. They were all messy.


Is it worth it? Yes. I love the crisp from the cracker, and those ganache (you definitely have to drizzle them on top!). Love the combination! My sister and I fought for the last cupcake! I'd definitely going to try this recipe again, with some alternation, I guess.

Monday, May 9, 2011

Yellow River


April was a cupcake month. I've been baking lots of cupcakes apparently. I decided to try something else and was glad when I found a couple packets of yeast. I decided to make some bread.

I've learn the Yellow River recipe when I was in my first year in culinary arts school. However, I never had the chance to try making them. I was in a different group, and my group was assigned to do something else.

I've tried to google for more information on this bread, as I didn't quite remember the shape of this bread. But I found none. So, I decided to do some experimenting with this bread.

Yellow River
125ml milk
25g compressed yeast
75g sugar
pinch of salt
1# egg
412g strong flour
raisins/mixed fruit
yellow coloring
sugar for sprinkle


1. Combine all ingredients, except for raisins.
2. Mix until well.
3. Rest the dough for 15 - 20 minutes.
4. Knock the dough, and sprinkle the raisins into it
5. Divide the dough into six, and shape the dough - roll them into a long rope, and braids them (I'm not really sure how to explain them).
6. Bake for 15 minutes at 180 degree Celsius.
7. Glaze bread with butter, and sprinkle some coarse sugar

Sunday, April 17, 2011

Swiss Meringue Buttercream


I've never really make any Swiss Meringue Butter Cream before. I did however experimented on Italian Meringue Butter Cream. They were much difficult than Swiss, in my opinion. (I've found out about the Italian before Swiss!) So, when Aimi from burp! le feastin avec moi asked me about meringue butter cream last year, I gave her a recipe of Swiss Meringue Butter Cream.


In making Italian Meringue Butter Cream, I have to pour the sugar syrup to the beaten egg white. I have to be careful with the timing of boiling the sugar syrup and beating the egg white. There was too many works. 

In preparing Swiss Meringue Butter Cream however, all I need to do was placing the sugar and egg white in a heat-proof bowl, and  Place sugar and egg whites in the heat-proof bowl of an electric mixer over a pan of simmering water, and whisk until the sugar has dissolved. It's much more simple in my opinion.


I'm glad that the butter cream turns out really well and pretty too!


(Martha Stewart's Recipe)
500gm sugar
10 large egg whites
500gm  unsalted butter, cut into pieces
2 teaspoons vanilla extract  (or any other desired flavoring)


1. Place sugar and egg whites in the heat-proof bowl of an electric mixer. Set bowl over a pan of gently simmering water, and whisk until sugar has dissolved and egg whites are hot to the touch, about 3 minutes

2. Transfer bowl to mixer stand. Using the whisk attachment, beat on high speed about 10 minutes, until mixture has cooled completely and formed stiff and glossy peaks.

3. Add the butter, one piece at a time, and beat until incorporated after each addition. If the butter cream appears curdled after all the butter has been added, continue beating. It will become smooth again. Add vanilla, and beat just until combined.

4. Switch to the paddle attachment, and beat on the lowest speed to eliminate any air pockets, about 5 minutes.  If you have taken it out from the fridge or freezer then bring it back to room temperature and whip it before use.

Tuesday, April 5, 2011

Apple Cream Tart


I missed my kitchen (okay, it's my mum's) a lot while being away for two weeks. So, when I get back from my 'disappearance' I told my mum I wanted to bake something. I flipped over some of my magazine to search for a new dishes to be experimented on. Then, I found a recipe of Apple Cream Tart from Food Digest's volume 4. The recipe was provided by Laura Calder. So, I thought, I should give it a try :)

Of course, mine didn't look as good as Calder's

Apple Cream Tart

Tart Shell
1/2 cup butter
1/2 cup sugar
1/2 tsp vanilla
1 cup flour

Cream Filling
1 egg
1/2tsp vanilla
8 ounces cream cheese, softened
1/4 sugar

Topping
3 apples - peeled and thinly sliced
1/4 cup sugar (I used brown sugar)
1/2 tsp cinnamon
1/4 cup slivered almonds or chopped walnuts.

Tart Shell
1. Heat the oven to 200 Celsius. Make the crust: cream the butter and sugar. Stir in the vanilla. FInally mix in the flour to make a smooth dough.
2. Press into the bottom of an 20cm/8-inch spring-form pan, giving it about a 1-inch/2.5cm rim. Bake 15 minutes until lightly golden. Remove from the oven.

Cream Filling
1. Beat all the ingredients for the cream filling together until smooth.
2. Remove the tart shell from the oven. Spread over the cream mixture.

Topping
1. Make the topping by tossing the apple slices with the cinnamon, sugar and nuts.
2. Arrange the apple slices on top, then scatter over the nuts. Bake until the apple are tender and golden, about 40 minutes.


I had some leftover dough for crust and filling. I sprinkled some chopped chocolate on top, and bake them in the muffin tin :)

Sunday, January 16, 2011

Experimenting: Macaron 2


This is my second attempt to make macarons. Well, if you remember, the last time I make macaron, it didn't have the smooth shell, and they were a bit burnt. I was glad that my second attempts turned out a little better, though I could improve more in making this cute little cookies. Anyway, I was wondering if there's any recipe with less sugar in them. Most of my family members thought that these cookies are too sweet for them.

Saturday, November 27, 2010

Mexican Bun

 
While I was out shopping with my mother a months ago, she mentioned her cravings for this Mexican bun. When I went home, I googled on the internet and find a recipe. I've been planning to make this bun for her. Of course, experimenting is a new recipe is part of my hobby too :) 

However, while planning to experimenting this recipe, I had a few problems with ingredients. So, I haven't had the chance to experimenting until recently. This bun consist of three parts - dough, filling, and topping which you had to pipe spirally on top of the bun.

 Yes, I know that my piping is sloppy.

 But, once they're in the oven, they look pretty okay~ Well, the fillings melted.

These are the delicious buns! Okay, so I put on too much toppings on top.

But the result is so worth it. Crusty toppings with soft bun and a hint of coffee combined with the melted butter on the center/filling. They are soo good!


Mexican Bun Filling

200g butter
1/2 tsp vanilla essence
70g brown sugar

1. Beat butter with medium speed for 3 minutes. 
2. Add in vanilla essence and brown sugar.
3. Keep refrigerated until ready to use.

Mexican Bun Topping

200g butter
160g icing sugar
3nos eggs - beaten lightly
2 tbsp instant coffee + 1 tbsp hot water or coffee flavoring
200g flour

1. Beat butter with medium speed for 5 minutes.
2. Carefully beat in icing sugar, eggs and coffee flavoring.
3. Sieve flour into the mixture, and beat until it is mixed well.
4. Keep refrigerated until ready to use.


Mexican Bun Dough

500g flour - sieved
2 tsp bread improver + 2 tsp bread softener (optional)
75g castor sugar
3 tsp dried yeast
1 tsp salt
1 # egg
250ml milk
60g butter - soften

1. Preheat the oven over 170°Celsius.
2. Sieve flour, sugar and salt with a whisk. Add in yeast, bread improver and bread softener.
3. Add in egg and milk.
4. Knead the dough and add in butter. Knead the dough until soft for about 10 to 15 minutes.
5. Divide the dough to 15 small ball, and cover with plastic food wrap for 10 minutes.
6. Flatten the dough on palm and scoop the filling and put it on the center of dough. Seal the dough tightly so that the filling didn't burst out of bun.
7. Arrange bun in the non sticking baking pan. Let the dough rest for 45 minutes.
8. Pipe the topping on top of bun spirally from top center.
9. Bake bun in the oven for 15 minutes or until golden brown.


Congratulation me!

I haven't visit my blogs for a while. Last week, I was away attending my cousin wedding and visiting relatives. I went back home two days ago and had my convocation yesterday (Yes, I had bachelor degrees in culinary arts now :D).

LinkWithin

Related Posts Plugin for WordPress, Blogger...